Heavy pipeline contamination is rarely a single problem. It may combine wax, sand, scale, water, corrosion products, and microbial growth. These deposits can narrow flow paths, damage pumps, distort measurements, and conceal active corrosion. For operators asking how to handle heavy contamination in pipelines, the safest answer begins with evidence, not aggressive cleaning.
The AMPP/NACE IMPACT study estimated that corrosion costs the global economy about $2.5 trillion annually, equal to roughly 3.4% of global gross domestic product. That figure shows why contamination control deserves engineering attention. API 1160 recommends risk-based pipeline integrity management, including threat identification, inspection planning, and documented corrective action. Operators should therefore sample the deposit, confirm its chemical makeup, and review pressure, flow, and temperature records before selecting a cleaning method.
Start with a controlled assessment. Is the deposit soft wax or hard mineral scale? Does the line contain hazardous gas, stagnant water, or damaged internal coating? These details change the risk profile. Intelligent pigging, mechanical scraping, filtration, chemical treatment, and water removal may work together, but each method needs compatibility checks. A foam pig may clear loose debris. It may also become stuck in a heavily restricted section. That possibility is easy to underestimate.
Industry guidance from PHMSA and ISO 55001 supports documented decisions, competent personnel, and verifiable maintenance outcomes. After cleaning, operators should confirm restored flow, inspect removed solids, and reassess corrosion risk. One pass is not proof. Poor sampling can mislead even experienced teams. The best 2026 strategy is therefore a measured cycle: characterize, isolate, clean, inspect, verify, and monitor continuously. It is practical, defensible, and still open to improvement.
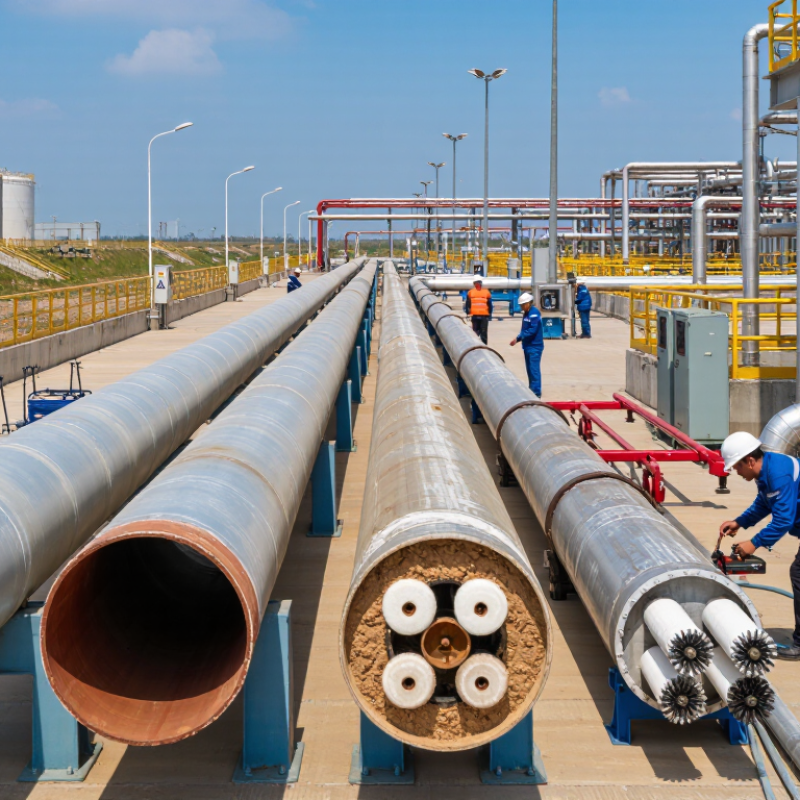
Heavy contamination should be assessed before any cleaning plan is chosen. Start with operating records, pressure trends, flow changes, and recent maintenance reports. A sudden pressure drop may indicate solids, wax, scale, or an internal restriction. Do not guess. Confirm the condition with controlled sampling, inspection tools, and laboratory analysis.
Samples should come from more than one location, because contamination can settle unevenly along the pipeline. Color alone is unreliable. Particle size, moisture, chemical composition, and deposit strength provide stronger evidence. Small clues matter.
Tips: Photograph deposits before removal. Record the sample location and operating temperature. Compare upstream and downstream pressure. Check whether contamination entered through the product, corrosion, construction debris, or poor storage. Review cleaning history carefully. A forgotten repair can explain a recurring deposit. Keep chain-of-custody records for every sample.
Root-cause analysis should connect field evidence with process conditions. For example, low velocity may allow heavy particles to settle, while temperature changes can harden soft deposits. Corrosion products may point to water intrusion or ineffective control measures. In some cases, the suspected cause is only part of the problem. That uncertainty deserves attention.
Experienced teams should document what they know, what they assume, and what still needs testing. The safest response may involve staged cleaning, temporary monitoring, and a revised inspection schedule rather than one aggressive intervention.
Heavy contamination in a pipeline should never be treated as one uniform problem. Start by classifying the material. Sediment, scale, wax, biological growth, and chemical deposits require different controls. A gritty sample may indicate soil entry or corrosion products. A soft, oily layer may suggest wax or process residue. Laboratory testing can confirm field observations, but visual evidence still matters.
Location changes the cleaning strategy. Check low points, dead legs, valves, bends, and areas near flow restrictions. Contamination often collects where velocity drops. Inspect upstream and downstream sections separately. Use inspection records, pressure trends, flow changes, and sample results together. One measurement can mislead. Temporary sampling points may also disturb settled material, so record the timing carefully.
Severity should reflect thickness, coverage, flow impact, and equipment risk. A thin deposit may only reduce efficiency, while a dense blockage can raise pressure and damage pumps. Estimate the remaining internal diameter when possible. Photograph deposits with a scale for comparison. Select cleaning intensity only after reviewing pipe material and operating limits. The method is not perfect. Early classifications may change after opening the line. That is acceptable when decisions are documented, reviewed, and supported by evidence. Personnel should use approved procedures, suitable protective equipment, and compliant waste handling throughout the work.
Classify contaminants by type, location, and severity before selecting cleaning and inspection methods.
The chart uses a practical engineering screening score from 1 to 5, where 1 indicates minor fouling and 5 indicates a critical restriction or high operational risk. Deposits are grouped by common contaminant type and pipeline location to support inspection, pigging, flushing, chemical cleaning, and localized maintenance decisions.
Heavy contamination demands a condition-based cleaning plan, not a fashionable tool. Start with evidence. Review pipeline diameter, wall thickness, product history, flow rate, bends, valves, and previous inspection records. A short video inspection can reveal wax, scale, sludge, or deformation before cleaning begins. It may also expose assumptions that were wrong.
For soft deposits, controlled batching with suitable chemical or mechanical action may work. Hard scale usually needs stronger mechanical cleaning, but excessive force can damage thin walls. Pipelines with dents, tight bends, or restricted valves may require flexible tools and slower runs. Water-based cleaning can remove soluble residue, while dry gas or vacuum recovery may suit moisture-sensitive systems. The wrong method can compact contamination deeper into a bend.
The NACE IMPACT study estimated global corrosion costs at about 3.4% of worldwide gross domestic product, or roughly 2.5 trillion dollars annually. That figure supports prevention, but cleaning decisions still need local inspection data. PHMSA pipeline incident reports also continue to identify corrosion and equipment damage among reported failure causes. Operators should record debris volume, tool condition, pressure changes, and waste characteristics after each run. The process is rarely perfect. A second cleaning pass may be safer than forcing one aggressive pass. Residual contamination should trigger a review, not a quick assumption that the pipeline is clean.
| Pipeline Condition / Contamination | Recommended Primary Method | How the Method Works | Typical Operating Parameters | Best Advantages | Main Limitations and Risks | Recommended Use Sequence |
|---|---|---|---|---|---|---|
| Loose sand, silt, water and light-to-moderate deposits Pipeline is straight, piggable and has suitable launchers and receivers. |
Utility pigging Use foam, solid-cast or brush-equipped pigs selected for the pipe condition. |
The flowing product or a controlled propellant pushes a pig through the line. The pig wipes, scrapes or absorbs deposits and removes free liquids. | Common starting velocity: approximately 0.5–3 m/s. Final speed depends on pig design, product flow, pressure drop and deposit load. | Good routine cleaning efficiency; relatively low water and chemical consumption; cleaning debris can be collected at the receiver. | Not suitable for unpiggable lines, severe dents, unsuitable bends, blocked valves or unknown internal restrictions. A stuck pig can interrupt operation. | Run a soft gauging or proving pig first, then increase wiping or scraping intensity gradually. |
| Hard wax, paraffin, scale or compacted sludge Deposit is strongly bonded but the pipe can tolerate mechanical contact. |
Mechanical scraping pigging Use scraper blades, brushes or a staged pig train. |
Rigid scraping elements apply direct shear and compressive force to detach deposits from the pipe wall. | Use a controlled speed, commonly within the operating window of about 0.5–3 m/s; confirm differential pressure and debris capacity before each run. | Effective against thick, cohesive deposits that softer pigs cannot remove; does not require chemical handling. | High drag and pressure demand; potential for scratching, damaging coatings or bridging at restrictions. Excess debris may cause blockage downstream. | Start with a lower-aggression pig, inspect recovered debris, then use progressively harder scraping elements if pressure and flow remain stable. |
| Severe sludge, mud, mineral scale or accumulated solids Flow is restricted and conventional pigging cannot remove the full deposit load. |
High-pressure water jetting Use remotely operated cleaning equipment where access and isolation permit. |
A focused water jet breaks up deposits by impact, erosion and hydraulic flushing. Vacuum recovery can remove loosened material. | Typical high-pressure cleaning systems operate around 5,000–40,000 psi; select pressure, flow and nozzle type according to pipe material and deposit strength. | Strong removal capability for heavy deposits; useful when the line is not safely piggable; cleaning intensity can be adjusted. | Creates wastewater and contaminated solids; requires strict control of injection hazards, confined spaces, splash, erosion and waste disposal. | Isolate and drain the line, remove bulk solids, jet-clean remaining deposits, vacuum the waste, then inspect and dry or preserve the pipeline. |
| Carbonate, sulfate or oxide scale Deposit is mineral-based and mechanical cleaning alone is slow or incomplete. |
Chemical descaling Use a compatible acid or chelating formulation after laboratory testing. |
The cleaning solution dissolves or complexes mineral deposits while inhibitors and controlled circulation help limit attack on the pipe material. | Contact time may range from approximately 2–24 hours; concentration, temperature and circulation rate must be established by compatibility testing. | Can reach deposits in complex geometries and remove scale that is difficult to scrape or jet away. | Risk of corrosion, hydrogen damage, chemical incompatibility and hazardous spent solution. Neutralization and wastewater treatment are required. | Identify the deposit, perform coupon and elastomer tests, circulate the solution, monitor pH and iron or dissolved solids, then rinse and neutralize. |
| Organic films, oil residue, biofilm or emulsified hydrocarbon deposits Contamination is chemically bonded or difficult to remove with water alone. |
Detergent or solvent-assisted circulation Use a compatible water-based cleaner or approved solvent system. |
Surfactants reduce interfacial tension and disperse oil; solvents dissolve compatible organic films; circulation transports the loosened material out of the line. | Often applied at ambient to moderately elevated temperature, with contact times commonly measured in hours; exact values require deposit testing. | Effective for organic contamination; can be combined with pigging to improve wall contact and removal. | Fire, vapor, toxicity and compatibility risks may apply. Waste streams can require specialized treatment and may be difficult to separate. | Remove loose solids first, circulate the cleaner, separate and recover the waste, rinse thoroughly, and verify cleanliness before return to service. |
| Internal corrosion products, rust, coating debris or localized adherent deposits Cleaning must be performed during shutdown with direct access to the pipe interior. |
Abrasive blasting or specialized mechanical tooling Use only where the pipe wall and coating system are suitable. |
Abrasive particles or powered tools remove adhered material through controlled impact, cutting and friction. | Abrasive type, pressure and stand-off distance must be selected for the specified surface profile and remaining wall thickness. | Provides high local cleaning power and allows visual control of difficult areas, welds and fittings. | Usually requires shutdown, access openings and containment. Dust, abrasive entrapment, spark generation and wall loss are important hazards. | Inspect wall thickness first, remove loose contamination, clean locally, collect all abrasive, and perform visual and non-destructive inspection. |
| Unknown contamination or suspected near-blockage Pipeline condition, deposit composition or internal geometry is uncertain. |
Diagnostic inspection followed by staged cleaning Use gauging, pressure monitoring, sampling and internal inspection where feasible. |
The condition is characterized before selecting the least aggressive method capable of removing the deposit without creating a blockage or damaging the pipe. | Use low-risk proving runs and continuous monitoring of pressure, flow, pig position, recovered solids and fluid quality. | Reduces the chance of choosing an incompatible method and provides evidence for the next cleaning stage. | Adds planning time and may require shutdown, sampling, inspection tools or temporary equipment. | Survey the line, sample the deposit, check wall condition, select a low-aggression first step, and escalate only after reviewing operating data. |
Heavy deposits rarely disappear after one aggressive pass. A better method uses controlled cleaning stages, with inspection between them. Start with evidence. Review pressure trends, flow loss, fluid chemistry, and previous pigging records. NACE’s IMPACT study estimated global corrosion costs at about US$2.5 trillion annually, equal to 3.4% of global GDP. Deposits can accelerate that exposure by trapping water, solids, and corrosive compounds against the pipe wall.
The first stage should loosen deposits without destabilizing the system. Operators may reduce throughput, confirm valve positions, and select a compatible cleaning fluid. A low-strength solvent or dispersant can soften wax and sludge, while chemical descaling should follow laboratory compatibility tests. Mechanical cleaning then removes the weakened layer through suitable tools and controlled pressure. Keep differential pressure under constant observation. A sudden rise may indicate blockage, tool damage, or poor deposit movement.
Flush the line in measured sections, not all at once. Samples should be checked for solids, hydrocarbons, water, and chemical residues. The U.S. Energy Information Administration reports more than three million miles of natural gas pipelines in the country, showing why repeatable cleaning controls matter at network scale. Verification should include flow recovery, pressure comparison, internal inspection data, and debris analysis. The uncomfortable truth is that cleaning plans are often based on assumptions. They should not be. Field conditions change, and one failed inspection can reveal that the final pass was only partially effective.
Heavy contamination can hide behind normal pressure readings. In 2026, reliable pipeline care starts with verification, not assumptions. Experienced teams inspect deposits, corrosion, and flow restrictions before selecting a cleaning method.
They collect samples from low points, valves, and discharge areas. Those samples reveal whether the material is sediment, scale, biological growth, or process residue. A camera survey can expose problems that pressure data misses. Good evidence prevents an expensive guess.
After cleaning, performance must be measured under controlled operating conditions. Technicians compare flow rate, pressure loss, pump load, and fluid quality with trusted baseline records.
They should check several sections, because one clear segment does not prove the whole line is clean. Temporary filters and calibrated gauges can show whether debris is still moving downstream. Repeat sampling after restart adds confidence. It also protects equipment connected to the pipeline. Records should include time, location, readings, photographs, and unusual observations.
Prevention depends on the cause, not only the residue. Review filtration, storage, corrosion control, drainage, dead legs, and maintenance intervals.
Set alarm limits for rising pressure loss or falling flow. Train operators to report color changes, vibration, odor, and unexpected sediment. I have learned that cleaning schedules based only on calendars can fail. Conditions change. A risk-based interval is usually more useful, although it needs regular review. Rushed verification can miss contamination behind valves or inside low-flow branches. Inspect those areas deliberately, then update the operating plan.
Review pressure trends, flow changes, operating records, and recent maintenance reports. A sudden pressure drop may indicate solids, wax, scale, or an internal restriction. Do not guess.
Contamination rarely settles evenly along a pipeline. Collect samples near low points, valves, upstream sections, and discharge areas. Record each location and operating temperature. Small clues matter.
Check particle size, moisture, chemical composition, and deposit strength. Photograph deposits before removal. Laboratory analysis can distinguish sediment, scale, biological growth, and process residue.
Compare field evidence with flow rate, temperature, corrosion records, and maintenance history. Low velocity may allow heavy particles to settle. Temperature changes can harden soft deposits. Water intrusion may produce corrosion residue.
Consider diameter, wall thickness, bends, valves, flow rate, and product history. Soft deposits may need controlled chemical or mechanical action. Hard scale may require stronger mechanical cleaning. Excessive force can damage thin walls.
An unsuitable method may compact contamination inside bends or restricted valves. Aggressive tools can damage weak sections. Flexible tools and slower runs may suit tight bends. The plan may still be imperfect.
Compare flow rate, pressure loss, pump load, and fluid quality with baseline records. Use calibrated gauges, temporary filters, repeat sampling, and visual inspection. One clear section does not prove the entire pipeline is clean.
Review filtration, storage, drainage, corrosion control, dead legs, and maintenance intervals. Set alarms for rising pressure loss or falling flow. Report vibration, odor, color changes, and unexpected sediment. Conditions change.
Consider a second pass when contamination remains after controlled cleaning. Record debris volume, tool condition, pressure changes, and waste characteristics. Residual material should trigger a review. Rushing can miss deposits behind valves.
This guide explains how to handle heavy contamination in pipelines through a structured, condition-based process. It begins with a detailed assessment of the pipeline, including flow restrictions, pressure changes, operating history, and possible contamination sources. Contaminants are then classified by type, location, and severity so the cleaning plan can address the actual risks rather than applying a one-size-fits-all solution. Factors such as deposit hardness, moisture, corrosion potential, and pipeline accessibility should guide the choice of cleaning method.
For severe buildup, cleaning should be completed in controlled stages, gradually removing deposits while protecting the pipeline’s internal surface and maintaining safe operating conditions. After cleaning, performance should be verified through flow measurements, inspection, pressure monitoring, and confirmation that residue levels are acceptable. Finally, preventive measures—including routine monitoring, filtration, maintenance scheduling, and improved operating controls—can reduce the chance of contamination returning and support reliable long-term pipeline performance.
Dulles Equipment